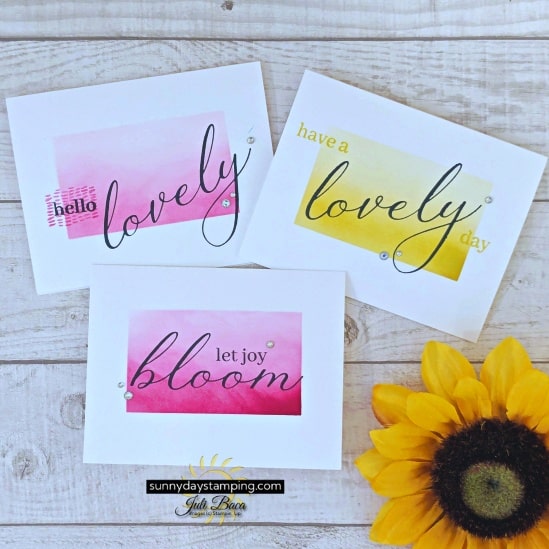
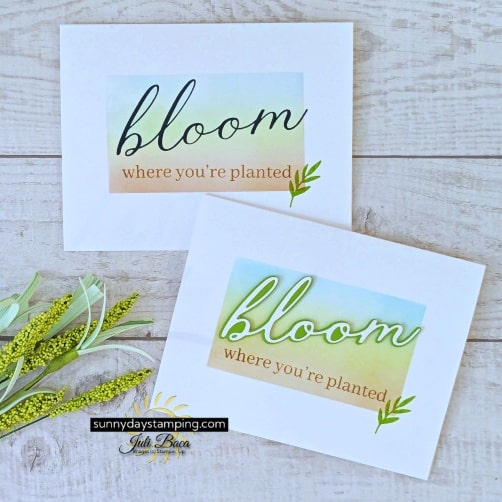
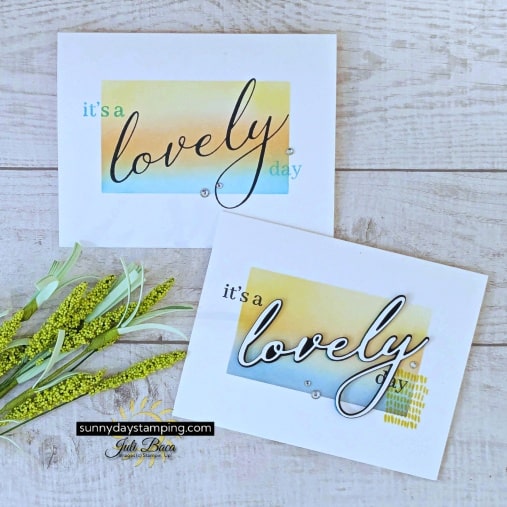
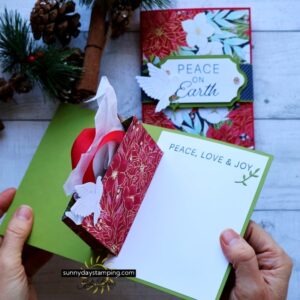
Elevate your card-making skills with this simple background masking technique! It’s mess free and stress free. With just a blending brush and vibrant colors, you can create stunning, handmade cards that impress. This easy method allows for endless customization using a reusable mask, making it perfect for both beginners and seasoned crafters. Discover how to craft beautiful, professional-quality cards with minimal effort and maximum impact!
Sign up for my email list to get a new project sheet FREE every week! Visit my tutorial store to purchase previous project sheets bundled by month they were released.
This technique is so fun and relaxing! Use one color of ink for a quick card or play around with multiple colors! Blending Brushes make it easy to do and no mess for stress free crafting.
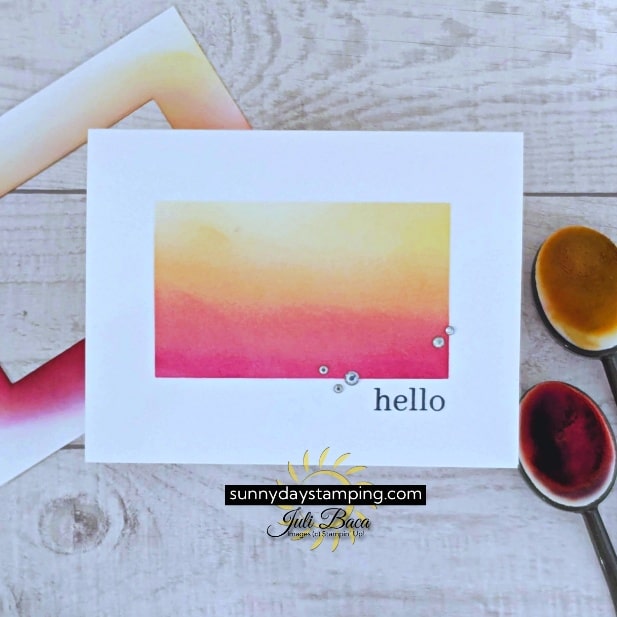
Cut a piece of cardstock so it’s the same size as your card base. This will become your mask.
Choose any shape of die you like and cut out the middle of the cardstock mask. This cut-out is where the magic will happen!
Line up your mask over the card base. Make sure it’s positioned perfectly and covering anything you don’t want colored.
Grab a blending brush and your choice of color. Using a circular motion, apply the color over the mask’s cut-out area. This technique will ensure even coverage and a smooth finish.
Remove the mask to unveil a striking, colorful background. Finish off your card by adding a sentiment and a few embellishments to really make it pop!
Want to Make These Cards?
Save
Click the button below for the full list of supplies I used for this project. If you like any of them, simply add them to your cart.
I’m incredibly grateful for my amazing customers, and as a thank you, I’ve created some exclusive tutorials just for you. See my specials below!
I’m happy to help and would love to answer any of your questions. Please reach out to me through e-mail. If you would like to place a Stampin’ Up! order, I would be thrilled if you selected me to be your demonstrator.