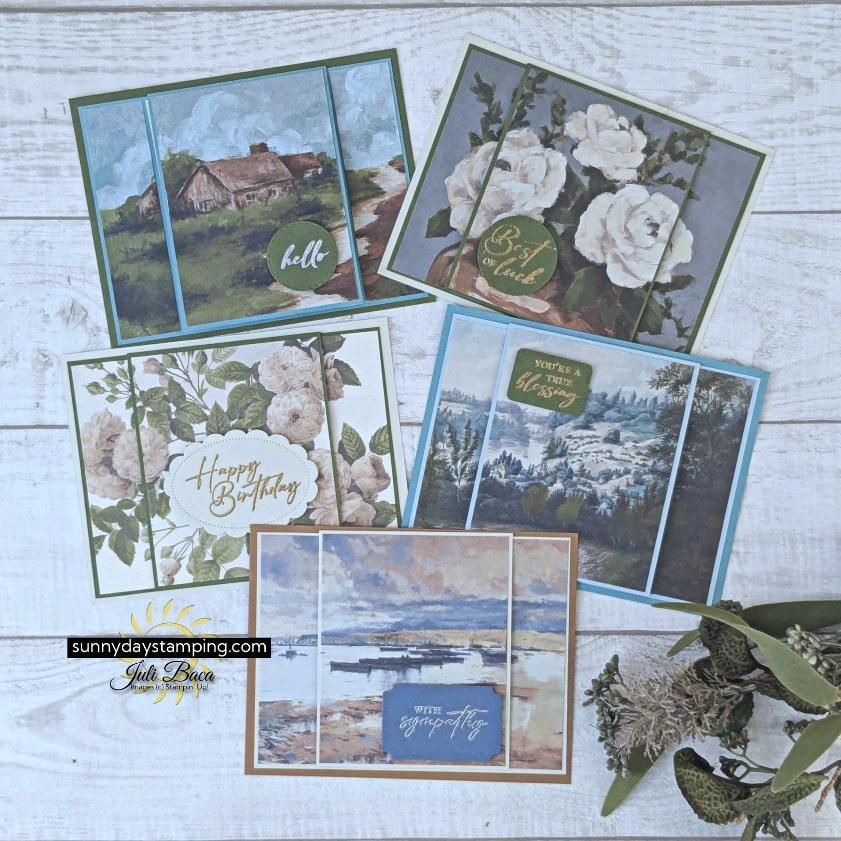
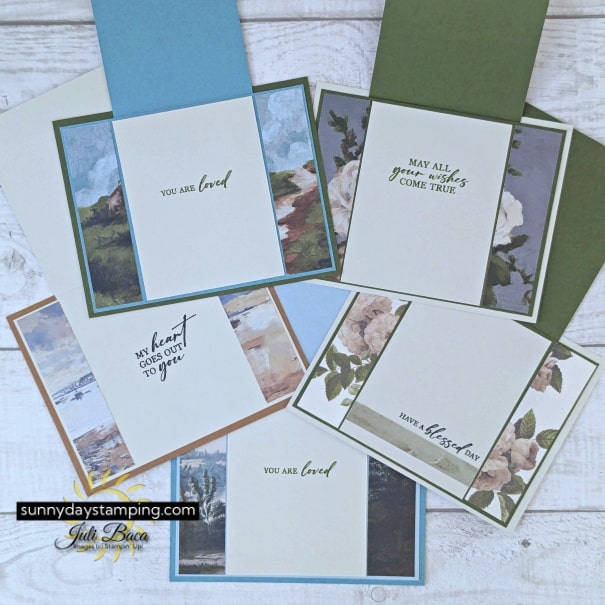
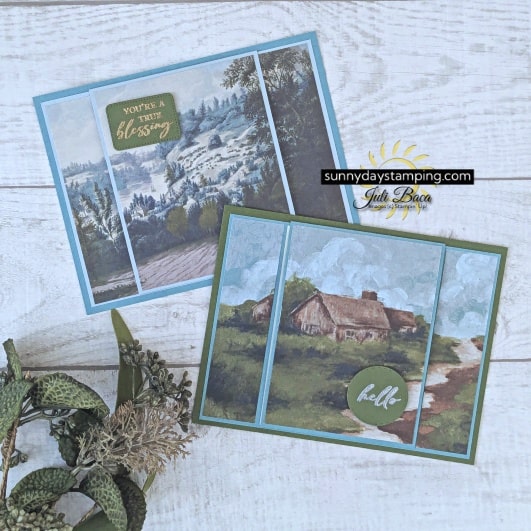
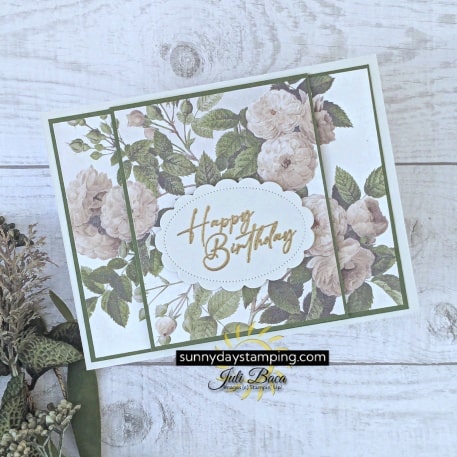
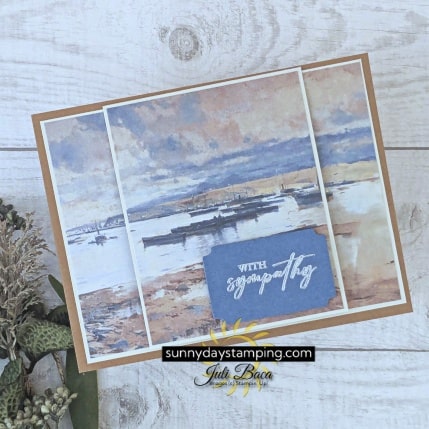
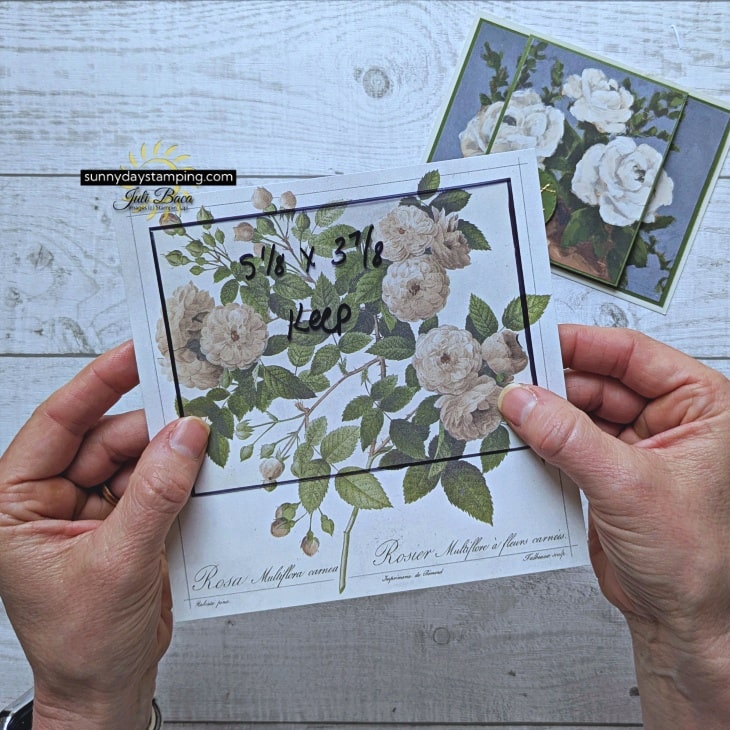
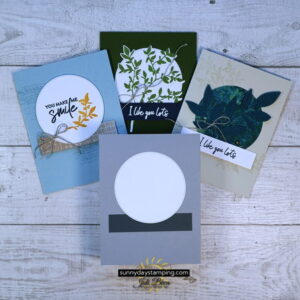
Creating cards that impress doesn’t have to be complicated! With the Flip Up Fun Fold card design, you can turn your pretty papers into a stunning display of creativity. This simple yet elegant design is perfect for using those larger images you’ve been saving, adding a touch of intrigue by dividing them into three captivating sections.
Watch the video for lots of tips including how to cut your pretty papers correctly the first time!
Cutting & Scoring Measurements
Basic Beige:
- Card Base: 5 ½” x 4 ¼”
- Inside: 3” x 3 ⅞”
Mossy Meadow:
- Layer: 5 ¼” x 4”
- Flip Up: 3 ¼” x 5”, score at 1”
- Sentiment: scrap
Beautiful Gallery Designer Series Paper:
- 5 ⅛” x 3 ⅞”, cut 1” from each end
Get FREE Project Sheets
Sign up for my email list to get a new project sheet FREE every week! Visit my tutorial store to purchase previous project sheets bundled by month they were released.
Grab Your Prettiest Paper!
This design works with all of your pretty papers!

-
Save

-
Save

-
Save

-
Save

-
Save
Cut It Right The First Time
Here’s my stress-free cutting tip!
- Use a window sheet or the backing from your stamp set.
- Cut it to the desired size and write the measurement on it.
- Use a scrap paper underneath and outline with a permanent marker for visibility.
- Move the mask around on your paper until it frames exactly what you want.
- Place the masked paper in your trimmer and cut with confidence!
Want to Make These Cards?

-
Save
Click the button below for the full list of supplies I used for this project. If you like any of them, simply add them to your cart.
I’m incredibly grateful for my amazing customers, and as a thank you, I’ve created some exclusive tutorials just for you. See my specials below!
June Specials
I’m happy to help and would love to answer any of your questions. Please reach out to me through e-mail. If you would like to place a Stampin’ Up! order, I would be thrilled if you selected me to be your demonstrator.