What’s 1 simple trick to make stunning cards?

What’s 1 simple trick to make stunning cards?
  • Save

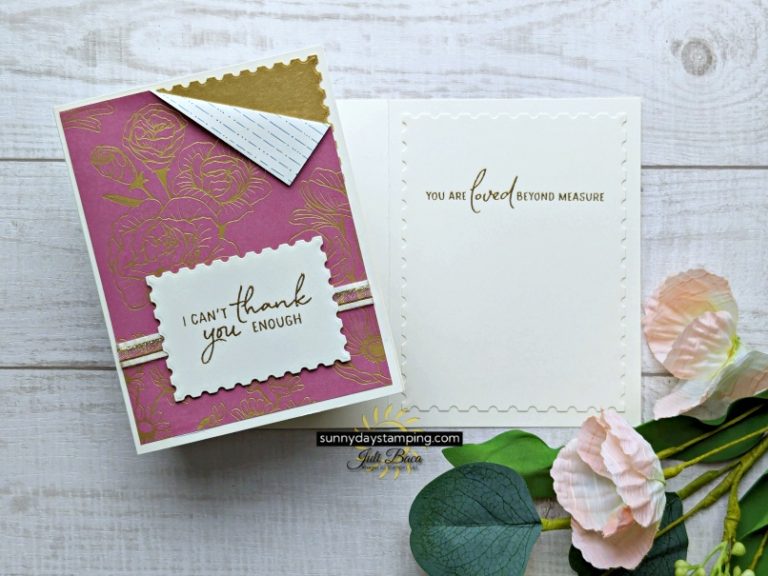
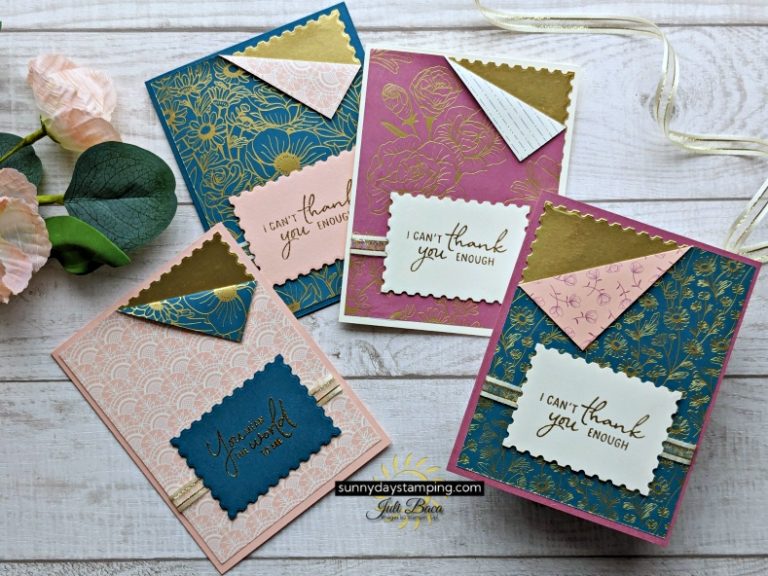
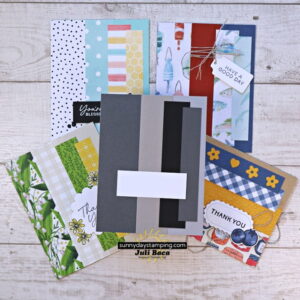
This trick is so simple, but makes such a big difference! Learn to make 2 simple, but elegant cards!  Keep scrolling to get the measurements for a 3rd card using all of the same supplies!  Watch the video for lots of tips!

Measurements for 1st Card

Pretty Peacock

Card Base: 5 1/2″ x 8 1/2″

  • Score at 4 1/4″

Designer Series Paper

Front Layer:  4” x 5 1/4″

  • Fold or score at a diagonal
    • 1 1/4″ on short end
    • 1″ on long end

Envelope Flap:  2 1/4″ x 6”

Gold Foil

Peek a Boo Layer: 3 1/4″ x 2 1/2″

  • Cut in half on diagonal to use on another card

Petal Pink

Greeting: 3 1/4″ x 2 1/2″

Very Vanilla

Inside Layer: 4” x 5 1/4” (or use the largest postage die to cut it out)

Ribbon: About 6”

Get My FREE Print & Make Project Sheets

  • Save
Sign up for my free email and get project sheets delivered right to your inbox every week! If you are already an email subscriber and would like past project sheets, just let me know the name of the ones you want. Thank you for subscribing!

Get Ideas!

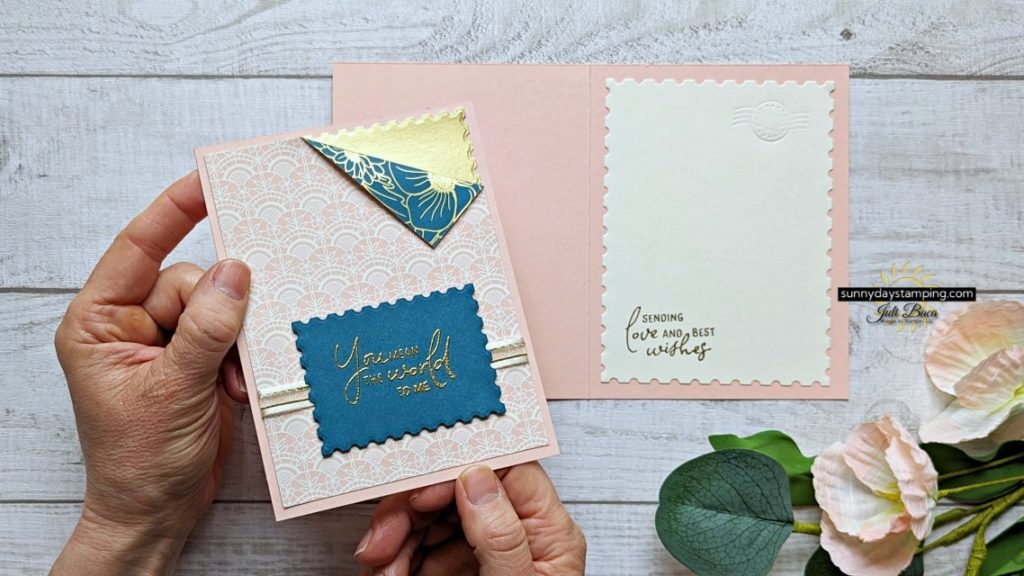
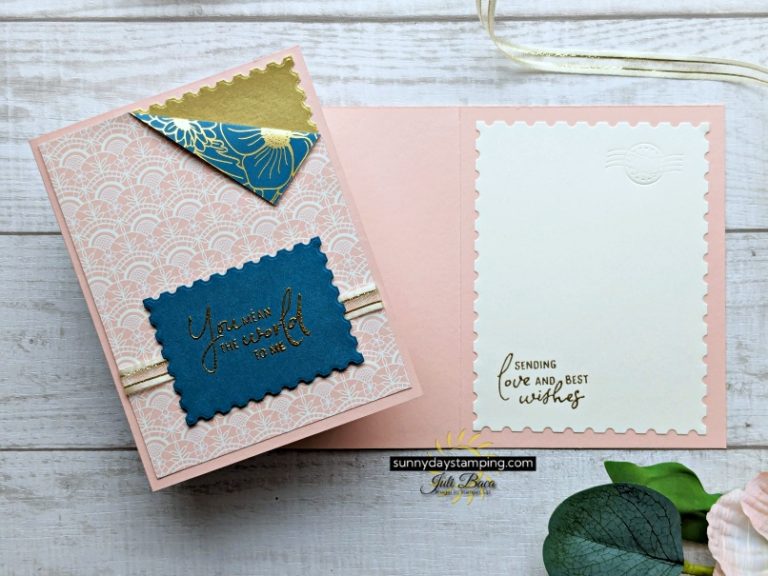
Choose your Designer Series Paper first and then pick a coordinating cardstock for the base.  Choose one color from the DSP to peek out of the corner.  I used gold foil.

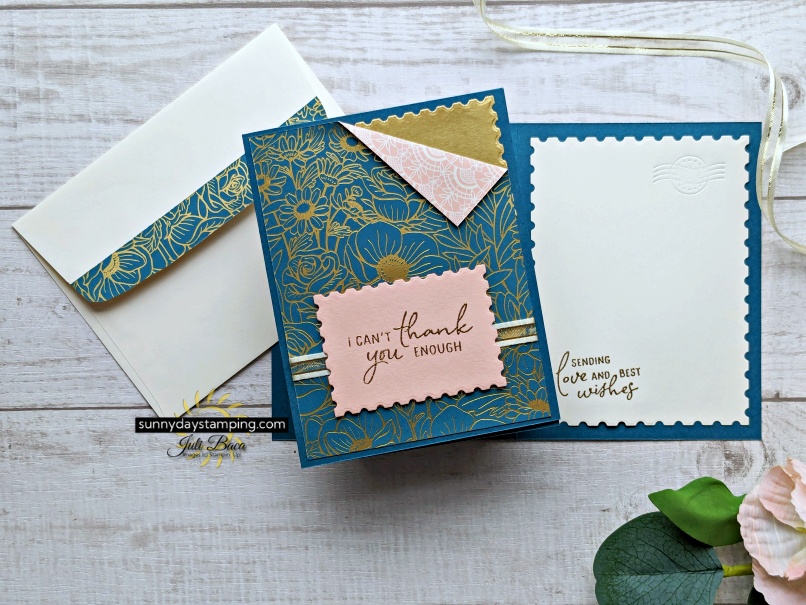
Instead of gluing the pretty paper right to the front of the card, turn down the corner of the double-sided paper to reveal not only the other side of the paper, but a special cut out is so stunning!  Try this with any double-sided paper!

The Perennial Postage die set creates those interesting cut out pieces.  You can cut out the rectangular pieces with the measurements provided if you don’t have the die set.

Measurements for 2nd Card

Petal Pink

Card Base: 5 1/2″ x 8 1/2″

  • Score at 4 1/4″


Designer Series Paper

Front Layer:  2” x 5 1/4″

Envelope Flap:  2 1/4″ x 6”


Gold Foil

Triangle: 3 1/4″ x 2 1/2″

  • Cut in half on diagonal to use on another card

Very Vanilla

Greeting: 3 1/4″ x 2 1/2″

Inside Layer: 4” x 5 1/4” (or use the largest postage die to cut it out)


Ribbon

About 6”


Measurements for 3rd Card

Very Vanilla THICK

Card Base: 5 1/2″ x 8 1/2″

  • Score at 4 1/4″


Designer Series Paper

Front Layer:  3/4” x 5 1/4″

Scraps: various sizes of Perennial Postage dies

Envelope Flap:  2 1/4″ x 6”


Gold Foil

Peek a Boo Layer: 3 1/4″ x 2 1/2″

  • Cut in half on diagonal to use on another card


Pretty Peacock

Greeting: 3 1/4″ x 2 1/2″


Moody Mauve

Square postage: die with embossed seal


Very Vanilla

Inside Layer: 4” x 5 1/4” or use large postage die

Gold Embossing

  • Save

Gold embossing powder looks great on light colors and dark colors!  It makes a plain card look stunning and fancy!

Want to Make These Cards?

Click the button below for the full list of all the supplies I used.  If you want to purchase anything, simply add them to your cart.  

Don’t forget to use my host code (at the top of my website) to earn points towards a FREE STAMP SET of your choice!

Sale-a-Bration ENDS TODAY!!!

February 29th is the last day to get free products with every $50 you order!  New freebies were added to the selection of products available for free (see photo for some of them)!

The free gift that comes in your starter kit also ends at the end of February. 

  • Option 1: Free Stampin’ Glass Mat Studio
  • Option 2:  Add an extra $30 to your starter kit (a total of $155 in products for just $99).

Earn free products when you shop, host or join!  Jan-Feb 2024

Choose a free product from the Sale-a-bration exclusive selection with every $50!  If you “host” by collecting orders from friends or your personal order is $300, you get $30 to spend on any product of your choice!

Join my team and choose one of 2 free gifts to add to your starter kit!  The Stampin’ Glass Mat Studio ($60 value) or add an additonal $30 in products.  The starter kit is $99 with free shipping and you choose $125 in products!  Click to find out more benefits!

Thank you so much for visiting my website today!  I would love to answer any of your questions, please reach out to me through e-mail!  If you would like to place a Stampin’ Up! order, I would be thrilled if you selected me to be your demonstrator.

You might also be interested in:

4 Comments

  1. Dot

    What would I do without your beautiful smile and your wonderful and funny screw-ups!!!

  2. Dot

    What would I do without your beautiful smile and your wonderful, funny screw-ups!!!

Leave a Reply

Your email address will not be published. Required fields are marked *