You won’t believe how quick and easy it is to make these cute treat and gift boxes! There’s hardly any measuring to do, so it is really simple. If you want to decorate your box, I’ve provided all of the needed measurements in the free project sheet below, so you can get right to making these adorable things!
If you like my video, please give me a like - it really helps!
These boxes make perfect gift packaging for treats, gift cards and cash for so many occasions! Below are just a few gift occasions I thought of:
- Birthday
- Thank You
- Get Well
- Teacher Appreciation
- Care Giver/Nurse Appreciation
- Anniversary
- Graduation
- Hostess Gift
- Valentine’s Day
- Holidays and more!
Minimal Supplies Needed
You probably have most of these supplies on hand! Embellishments can be added, but the plain boxes are super cute, too!
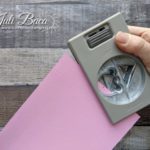
In the supply cart below, I added the “Ice Cream Cone Builder Punch” to use to make a thumb notch, but use whatever you have (like a circle punch). If you don’t have the Paper Trimmer, you could use your Score Board.
add your favorite cardstock to the supply list below
Let's Make a Box!
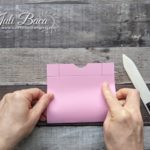
Fold small flaps in; glue and adhere to large flaps.
Step-by-Step Instructions
Skip optional steps for plain box
- Choose box size from list below
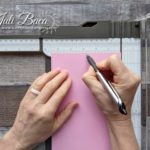
- Score all four sides of paper to chosen depth using Paper Trimmer
- Mark the center of narrow end
- Punch the center to create a thumb notch
- Fold bottom edge to first score line
- Turn paper and repeat
- Pre-fold all score lines with bone folder
- Cut along four short score lines (cut a wedge)
- Optional: adhere decorative paper to top and sides of box
- Optional: turn paper over and trim any overhanging decorative paper, re-punch thumb notch
- Glue (fold short flaps in; apply glue; adhere to large flaps to form box)
- Optional: cut box liner for bottom of box and set it in bottom
Optional Embellishments

-
Save
You can easily decorate boxes with Designer Series Paper, stamped paper, ribbon and gift tags.
Optional decorative paper measurements:
- To cut panels that create an 1/8” border around the box, reduce the actual measurements* by 1/4″
- To cut panels that create a 1/4” border around the box, reduce the actual measurements* by 1/2″
- To cut a panel to line the bottom of the box, reduce the actual measurement of the top of the box by 1/16” (or just bump your paper in by one line on the Paper Trimmer).
*Actual measurements of finished project are listed under each box size, so you can easily create your own decorations.
Fill Your Boxes
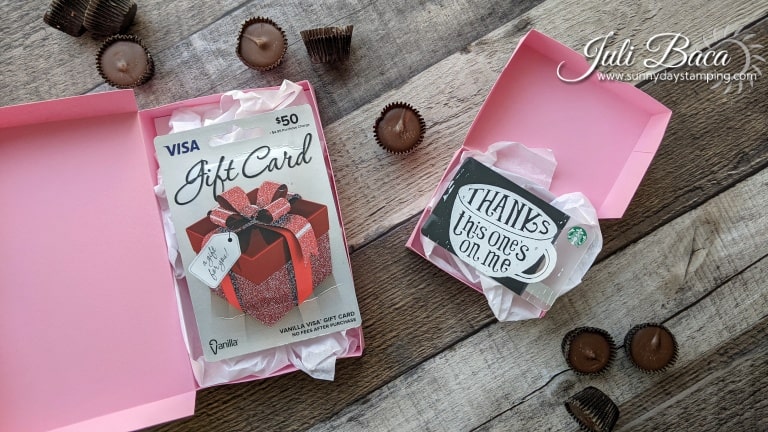
-
Save
The 1” depth boxes are great for gift cards, prepaid credit cards, cash, cookies or small treats like Fun Size candies or kisses.
The 1 1/2” – 2” depth boxes are perfect for lots of treats, cookies and candies (or a whole wad of cash).

-
Save
Box Sizes from Smallest to Biggest

-
Save
included are all of the measurments you need to make and embellish your boxes. Skip the optional decorative measurements if you are making a simple box.
Box #1
- ½ sheet of cardstock (8 ½” x 5 ½”)
- score depth 1 ½” on all sides
- mark middle at 2 ¾” on the short side
Actual measurements:
- top panel: 2 ½” x 2
- long front side panel: 2 ½” x 1 ½”
- short side panels: 2 x 1 ½”
Optional decorative elements:
- Bottom liner: 2 7/16” x 1 15/16”
- Top & Inside panels with 1/8” border (2): 2 ¼” x 1 ¾”
- Top & inside panels with 1/4” border (2): 2 x 1 ½”
- Long front side panel with 1/8” border (2): 2 ¼” x 1 ¼”
- Long front side panel with 1/4″ border (2): 2” x 1”
- Short side panels with 1/8” border (2): 1 ¾” x 1 ¼”
- Short side panels with 1/4″ border (2): 1 ½” x 1 “
Box #2
- ½ sheet of cardstock (8 ½” x 5 ½”)
- score depth 1” on all sides
- mark middle at 2 ¾” on the short side
Actual measurements:
- top panel: 3 ½” x 2 ¾”
- long front side panel: 3 ½” x 1”
- short side panels: 2 ¾” x 1”
Optional decorative elements:
- Bottom liner: 3 7/16” x 2 11/16”
- Top & Inside panels with 1/8” border (2): 3 ¼” x 2 ½”
- Top & inside panels with 1/4” border (2): 3” x 2 ¼”
- Long front side panel with 1/8” border (2): 3 ¼” x ¾”
- Long front side panel with 1/4″ border (2): 3” x ½”
- Short side panels with 1/8” border (2): 2 ½” x ¾”
- Short side panels with 1/4″ border (2): 2 ¼” x ½”
Box #3
- full sheet of cardstock (8 ½” x 11”)
- score depth 2” on all sides
- mark middle at 4 ¼” on the short side
Actual measurements:
- top panel: 4 ½” x 2 ½”
- long front side panel: 4 ½” x 2”
- short side panels: 2 ½” x 2”
Optional decorative elements:
- Bottom liner: 4 7/16” x 2 7/16”
- Top & Inside panels with 1/8” border (2): 4 ¼” x 2 ¼”
- Top & inside panels with 1/4” border (2): 4” x 2”
- Long front side panel with 1/8” border (2): 4 ¼” x 1 ¾”
- Long front side panel with 1/4″ border (2): 4” x 1 ½”
- Short side panels with 1/8” border (2): 2 ¼” x 1 ¾”
- Short side panels with 1/4″ border (2): 2” x 1 ½”
Box #4
- full sheet of cardstock (8 ½” x 11”)
- score depth 1 ½” on all sides
- mark middle at 4 ¼” on the short side
Actual measurements:
- top panel: 5 ½” x 3 ¼”
- long front side panel: 5 ½” x 1 ½”
- short side panels: 3 ¼” x 1 ½”
Optional decorative elements:
- Bottom liner: 5 7/16” x 3 3/16”
- Top & Inside panels with 1/8” border (2): 5 ¼” x 3”
- Top & inside panels with 1/4” border (2): 5” x 2 ¾”
- Long front side panel with 1/8” border (2): 5 ¼” x 1 ¼”
- Long front side panel with 1/4″ border (2): 5” x 1”
- Short side panels with 1/8” border (2): 3” x 1 ¼”
- Short side panels with 1/4″ border (2): 2 ¾” x 1”
Box #5
- full sheet of cardstock (8 ½” x 11”)
- score depth 1 ½” on all sides
- mark middle at 4 ¼” on the short side
Actual measurements:
- top panel: 6 ½” x 4”
- long front side panel: 6 ½” x 1”
- short side panels: 4” x 1”
Optional decorative elements:
- Bottom liner: 6 7/16” x 3 15/16”
- Top & Inside panels with 1/8” border (2): 6 ¼” x 3 ¾”
- Top & inside panels with 1/4” border (2): 6” x 3 ½”
- Long front side panel with 1/8” border (2): 6 ¼” x ¾”
- Long front side panel with 1/4″ border (2): 6” x ½”
- Short side panels with 1/8” border (2): 3 ¾” x ¾”
- Short side panels with 1/4″ border (2): 3 ½” x ½”


